2.22.2009

Maiden Voyage


Chuck, our fearless leader has his qajaq finished enough to give it a test run. So he shrink wrapped it and I met him at a boat launch on the Clinton River just outside of Mt. Clemens.


After we shooed away the geese looking for handouts I helped him into his boat. We both had drysuits on with too many layers on underneath. It was cold and starting to snow.


Chuck seemed to like his qajaq and it looked really nice. So he took a little spin in it and declared no changes needed to be made. How exciting for him.


So he'll take it back to the shop and skin it with nylon this week. We will all have to pay close attention as no one else's qajaq's will leave the shop with skin on.

Seems to take forever


So it took me a while to figure out the shape for the stem pieces. I finally decided and transferred the outline to a cedar plank and cut it out using a jigsaw. I have learned to use so many new tools and each one has a learning curve. This will be so much easier next time. Ha!


Next I attatched the stem pieces by lashing them to the gunwales.

I attatched the keelson to the stem pieces by pegging it into place. First I added a strip to build up the stern area, it needed a little more depth.


In this picture you can see the added piece and the lashing on the first rib in the right corner.


A different view, you can see the pegs that I sawed off flush with the gunwales.


Some of the ribs had to be blocked up to meet the keelson. Then I lashed the keelson to the ribs.


These steps seem so simple writing them down, but they took hours for me to do. I have really been starting to freak out that I wouldn't have the qajaq finished in time. We have to be out of the shop on Saturday, Feb. 28th. But I've talked Chuck into allowing us to work on Saturday and clean on Sunday.

I put the qajaq on the floor to test fit it. It fits!! Now I'm working on fitting the masik, the large piece of wood you see here.


The masik holds you in place and gives you a lot of support. It is placed just behind your knees and as low as you can make it and still get into the qajaq. The masik is curved so it can be a little tricky. I have Pete to thank for finding enough curved branches for the whole class!


Ken's qajaq is on the left & you can see he has his chines in place on either side of the keelson. This is my next step. Then the masik, another piece to go over each stem, 2 more curved deck beam still needed...see why I'm worried?

Here is an oak log that was used to cut ribs from. You can see some of them on the right, we keep them covered and damp so they stay pliable.

2.10.2009

I have ribs


Rib stock is special as it needs to be air dried, not kiln dried like most wood. The grain also needs to be clear and going a particular way to help the bending process. So we decided to cheat and order rib stock from a guy who runs a qajaq building school out west. Unfortunately the shipment got lost in space. So we have been doing a mad scramble to come up with decent wood for our ribs. Someone finally found someone else who went out and cut down an oak tree for us.


So into the shop came logs that had to be processed by us, or I should say Chuck. I had started bending ribs with some of the stock we had left over and was having a rough time of it and feeling really bad about breaking pieces. Then I got my hands on the green ribs and everything fell into place, it was like night and day. And then it was late at night and time to go home.


I got back to the shop on Saturday to find my qajaq frame had been moved and my rib stick had disappeared. Yes, I had a minor melt down as it had taken me days to figure out how to make that darn thing. So an hour later I had another one made and started bending ribs again.


After getting all the ribs bent, I placed the keel strip on top of them to check them. A few will have to be blocked to meet the strip and a few I took down a little. Next I pegged the ribs into place and planed down the ends of the gunwales for the stem plates.


I taped cardboard to the ends of the gunwales to work up a pattern for the stem plates. I am so excited at my progress, I think this project might actually get finished.


Here is Ken lashing his stem plate to the end of his qajaq.


2.03.2009

Back to work


I managed to make it back into town so I could get to the work shop Monday night. I had the fun task of lashing all the deck beams into place. We used a flat, waxed, artificial sinew for the job. I chiseled a trough on the outside of the gunwales for the sinew. This way the lashings will be recessed and shouldn't rub or be visible under the skin.


Meanwhile Danielle was back and working on steam bending her ribs. Here she is sighting down her qajaq to see if they line up nicely. You can see the ones she has laid out to go next into the steamer.


Here is the steam box we have set up and the high tech device we use to bend the ribs.


Ken was next and managed to get all his ribs on too. Next weekend will be my turn, so I kept an eye on these two.

1.30.2009

XC Ski Break

After the Martin Luther King Holiday I had a very busy week planning my first xc ski trip. I joined the Solar group to build my qajaq and they have tons of other fun activities and classes. I decided to take cross country ski lessons with them. The lesson took place in Roscommon, Michigan at the XC Ski Headquarters.


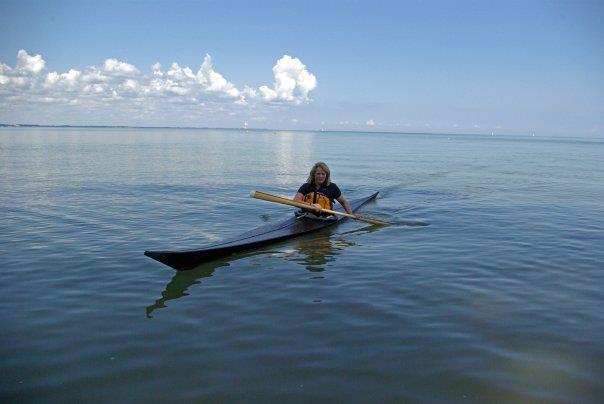
So I invited myself up to my friend Sharon's place for the weekend. She is into xc skiing and had been inviting me for a while, so no, I'm not that pushy.


We actually had quite a group for the weekend at their hunting lodge called Nawaka. We had 10 people for the weekend. I didn't know they had snowmobiles, so I got my first real ride and it was a blast.


Saturday morning Sharon, Patty, Amiee, her new friend Jamie and I went just south of Mio to go cross country skiing. It was a lot of fun and I fell up and down every hill on our first loop. This was only my third outing on my new skis and of course the lesson wasn't until Sunday morning.


I got up early sunday and drove the hour and fifteen minutes to Roscommon for my lesson. This is a shot of the 3 mile long driveway out of Nawakwa.


I met 24 other Solorites on a very cold 10 below morning for our class. I finally learned how to get up after falling, coulda used that the day before!


I drove back to Nawakwa where we had another fun packed snowmobile ride and a nice relaxing evening in front of the fire. Sorry, no photos of the gathering by the fire, too tired to remember.


I drove home Monday just in time to get some more work done on the qajaq.

1.27.2009

Measure twice...cut once

This weekend it was time to add the deck beams. This is challenging as it is a compound angle and no, I didn't know what that meant. The gunwales are at a 73 degree angle, so the deck beams were cut at a 17 degree angle where they meet. Then you have to figure out the horizontal angle since the boat curves in at the ends. It's pretty simple, just place the piece of wood across the gunwales and mark underneath along the gunwale where it meets. Cut, flip, repeat and you should have a perfect fit. The simple things are hard for me, but I eventually got them all cut.


The next step was to drill 2 holes thru the gunwales and into the deck beams for dowels. What I didn't realize was that every time I pounded the dowels into place, the gunwales shifted. By the end of it the gunwales had shifted an inch so the ends no longer met & I once again had a wonky kayak. I was very frustrated and mad at myself. Up steps Master Chuck to the rescue. We only had to replace the last deck beam in the stern and then we pounded and pulled the kayak back into shape. Whew! Once again I have a symetrical kayak.


Daniel is a Senior in High School and is building her own qajaq at school for credit. She has had a few setbacks, so we invited her to the shop to get back on track over the Holiday weekend. She was starting over with new wood for her gunwales.


Chuck had a little accident and had to re-attatch his "tailfin".

Look Dorothy Ken is sewing! He's actually lashing the deck beams to the gunwales for added strength and support. This is my next step.

1.16.2009

Getting nowhere fast

Well...this past weekend wasn't very productive. I tried to get the gunwales in the forms we have, but since I added some uplift to the bow they didn't fit into them. It took 3 of us an hour to wrangle the kayak into forms with clamps and pieces of wood. I was too tired to take a picture of the contraption we finally came up with.


Then I started working on sawing the ends They need to be filed down so they come together on a flat plane. And basically that's all I got done in 6 hours, this qajaq may never get finished.


Then to cap off the weekend I borrowed Chuck's qajaq to take to a pool session on Sunday. I drove all the way to Ypsilanti, where EMU has an olympic size pool. This would have given me a chance to see if I liked his dimensions. Unfortunately the pool was closed, so I still don't quite know what size my kayak will be. I'm thinking a 20" beam, my nighthawk is 22".


So my homework is to read up and figure out how to install the deck beams. Hopefully it will begin to make sense...to me and I'll make some progress this weekend. I previously said you don't need to be a rocket scientist...I might have been wrong.